Open system settings.
Select "Apps & notifications" 🡪 "Advanced" 🡪 "Special access permissions" 🡪 "Show on other apps".
Go to VBot and allow it.
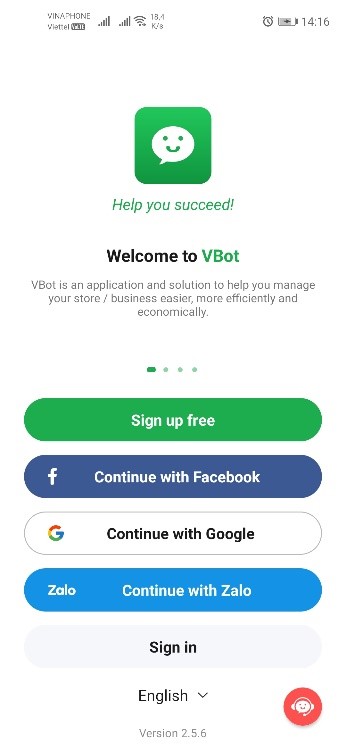
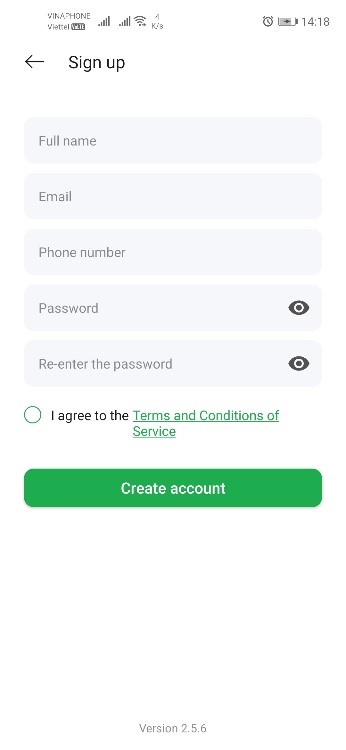
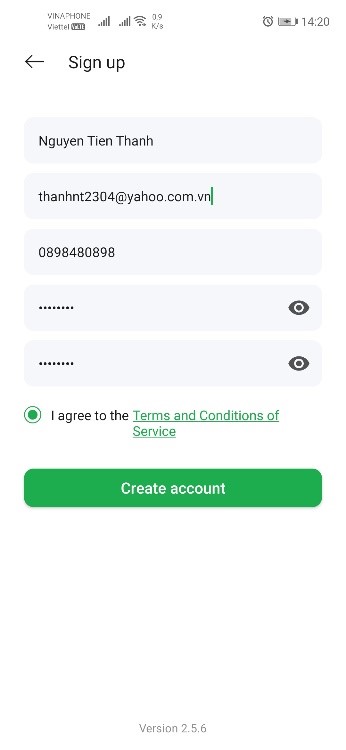
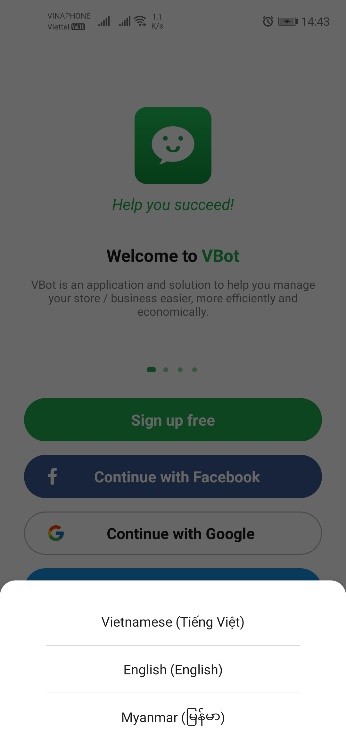
From the login options screen select "Sign up".
Complete the information and agree to the "Terms and Conditions of Service" to sign up (Note: email and phone number are unique to each account, can not use the same email or phone number on different accounts).
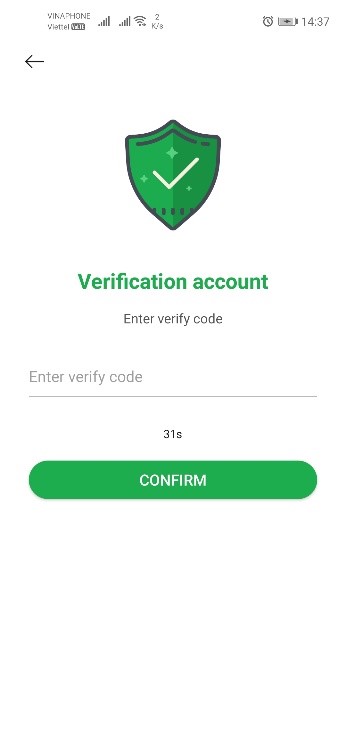
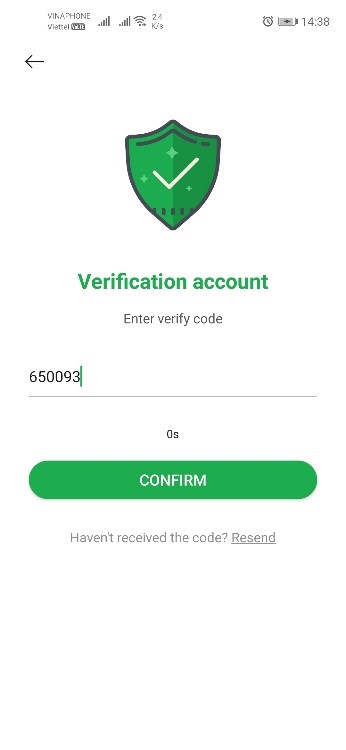
After click "Create account", it will move to the page to choose authentication method (via email or via phone number). Choose a method then click "Submit", a confirmation code will be sent back to you, using that verification code to verify your account. When the countdown time is up and you still haven't received your verification code, press "Resend" to request another verification code.
Authentication is complete, the account will automatically switch back to the login page, use the newly created account to log into VBot.
Use your registered account to login to VBot.
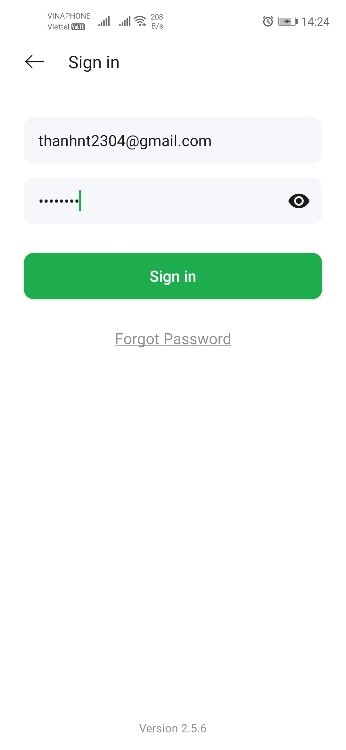
Forgot password
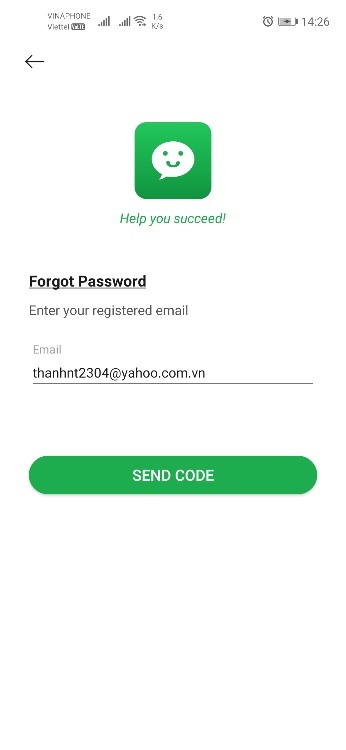
Select forgot password, enter the email of the account which you forgot the password to and click “Send code”.
The verification code will be sent to your email (When the countdown time is up and you still haven't received the code, click “Resend” to request a new code).
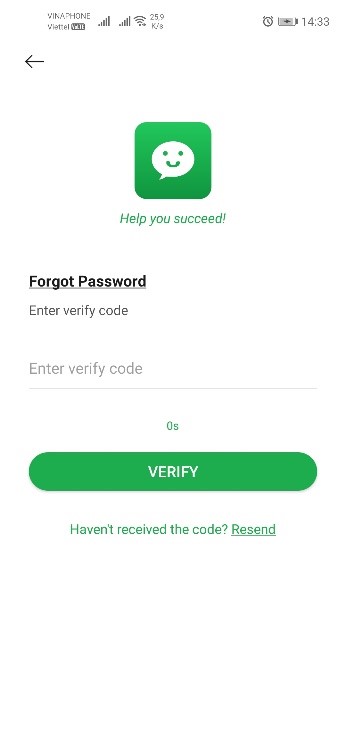
Enter your verification code and click "Verify" and you will be moved to a new password change page. Enter a new password, confirm your new password and click “Change Password”. Successfully changed password, VBot will automatically return to the login page, use the new password to log into the account which you forgot the password.
(First login will display the screen to accept the terms and conditions of service)
Sign in with Facebook
In the login options screen, choose to log in with Facebook.
For devices that already have the Facebook app, only login approval is required.
For devices without the Facebook application, will be redirected to the Facebook login page, login to your account.
Sign in with Google
In the login options screen, choose to sign in with Google.
For devices with 1 Google account, the system will automatically log in with that account. For devices with multiple Google accounts, select the account you want to sign in to. For devices without a Google account will be asked to sign in with a Google account.
Sign in with Zalo
In the login options screen, choose to log in with Zalo.
With the device logged in with Zalo account, the system will automatically log in with that account.
There are 2 ways to switch languages:
Change language at the login option screen: Select the language which you want to switch (Vietnamese, English, Myanmar)
Change language when logged in:
Select the tab "Accounts", select Settings (gear icon on the right corner), click on the "Language"
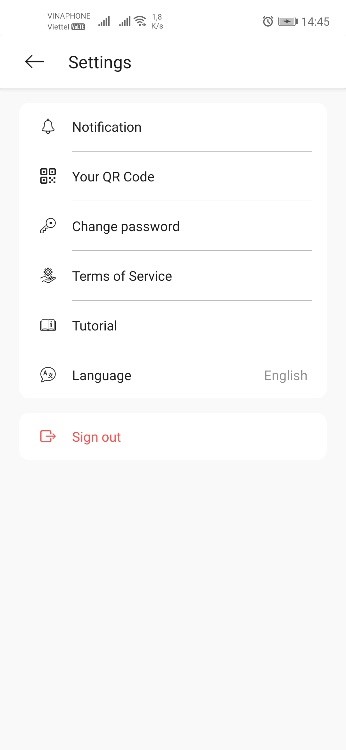
Select the language which you want to transfer (Vietnamese, English, Myanmar) and click "Save".

Link a Vbot account to a Facebook Page:
(* Note: You can only link up to 3 pages on Facebook)
Log in to the VBot account which you want to link
Click on the thumbnail in the top left corner to open the Menu

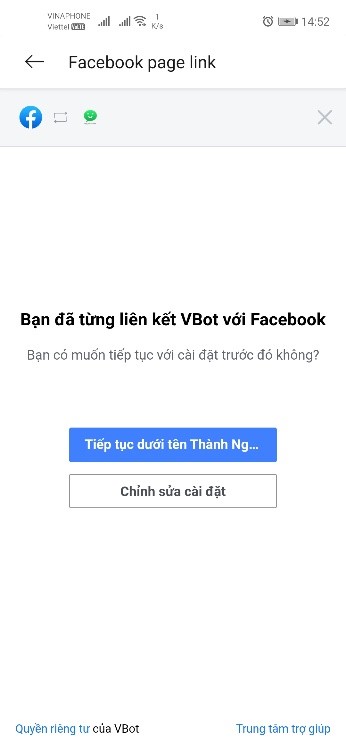
Select "Link account", you select the section "Link with a Facebook account”

Log in to the Facebook account that contains the page you manage to link to, by default Facebook will select all pages but up to only 3 links can be active at the same time.
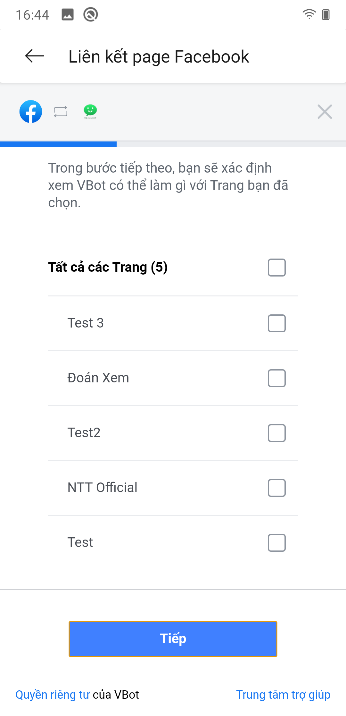
After logging into your account, the Facebook pages will display a list below with the Facebook icon.
Link a VBot account to a Zalo OA:
Sign in to your account.
Click the icon in the upper left corner to open the menu.
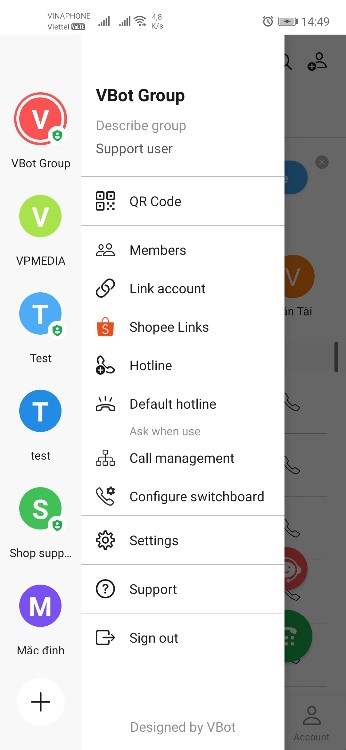
On the screen that links to your account, select "Link to your account Zalo"

Log in to the Zalo account you want to link
After the link is complete, Zalo OA will display the list below with the Zalo icon.
Log in to your VBot account.
Click the icon in the upper left corner to open the menu.
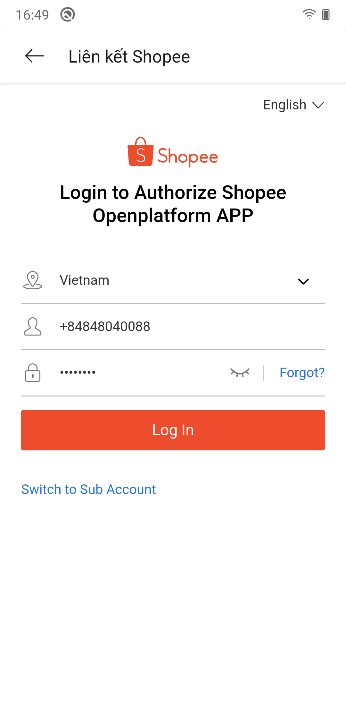
Open the Menu, select "Shopee Link”

Log in to your Shopee account (Note: choosing your region correctly) Choose to agree to link Shopee with Vbot .
After linking successfully, the main screen interface will add the "Shop" section.
Sign in to your account.
Click the icon in the upper left corner to open the menu.

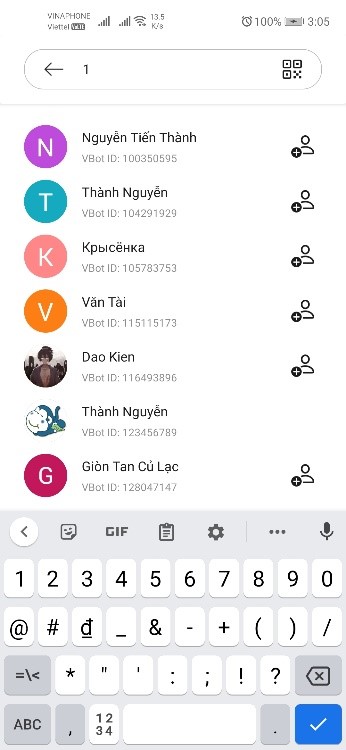
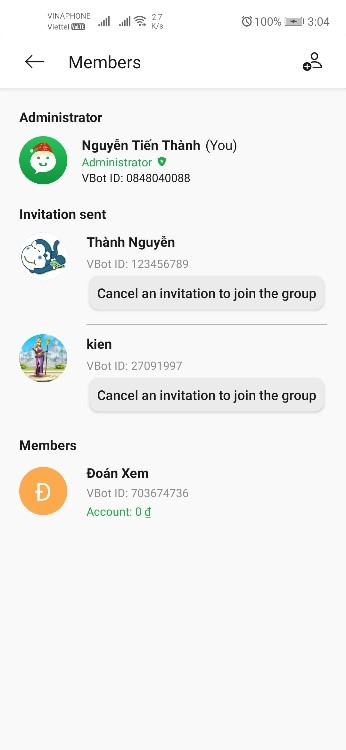
Select "Members", the list of members will be displayed in full here.
Add members:
Click the icon in the upper right corner.

Enter the VBot ID of the member looking for (or use scan QR Code to scan the code).
Click the add icon next to the account to invite members to the group.
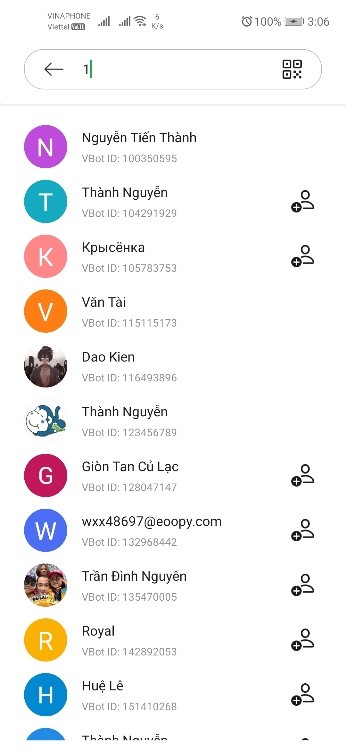
When the member accepts the invitation, appears in the list of group members.
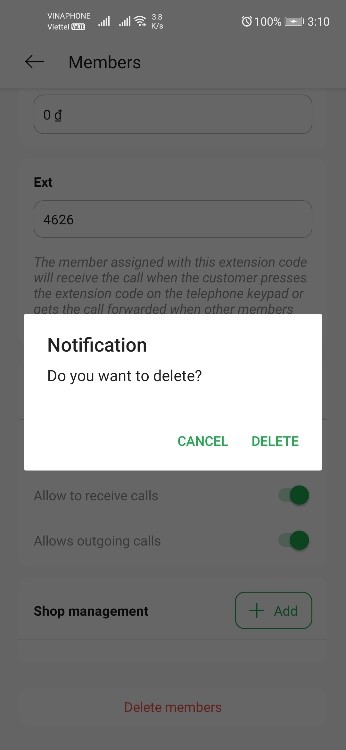
Remove members:
Select the member you want to remove from the group.
Scroll down to the bottom of the page, select "Remove member"
Confirm member deletion to remove members from the group.
Manage members:
Group accounts: Group administrators can share their accounts with group members (only use for the group)
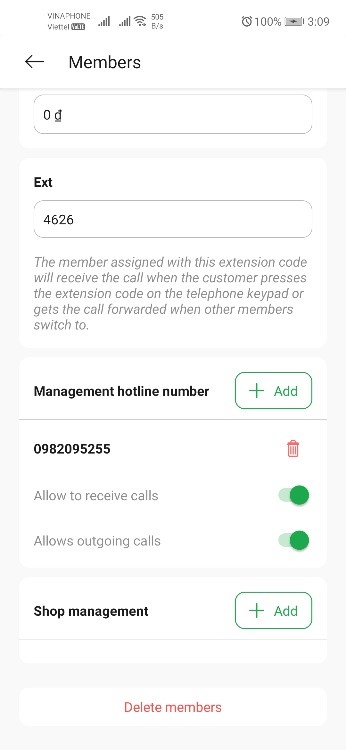
Branch: Each member will have a different extension code, the customer calls the switchboard and enters the member's extension code, the member will receive the call.
Management hotline: Managers can assign hotlines to management members, members can use hotlines to make outgoing calls and receive calls.
Manager shop: Manager can assign shop to manager, member can track order information, create task.
Sign in to your account.
Click the icon in the upper left corner to open the menu.

Select “Hotline”, your hotline list will be fully displayed here.
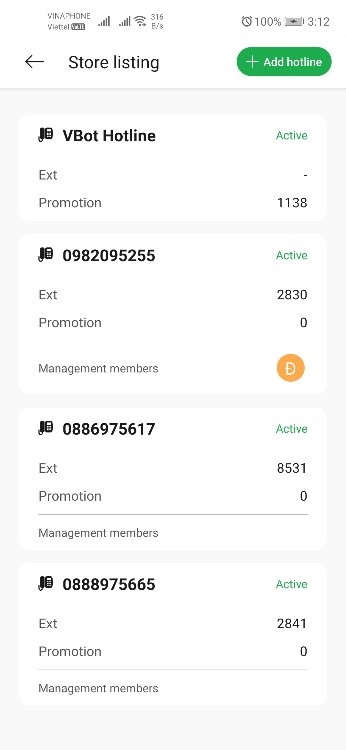
Add hotline (VBot supports customers to buy hotline):
(Note: You need to have enough money in your account to buy more hotlines)
Click the button "Add hotline" in the upper left corner to open the list of hotlines. General hotlines: Hotlines that all VBot accounts can use. Private Hotline: Hotline is only used for 1 account
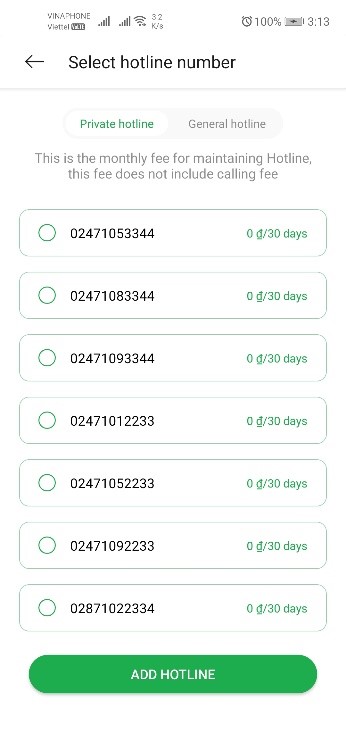
Select the hotline which you want to use, select "Add hotline" to add the selected hotlines to your hotline list.

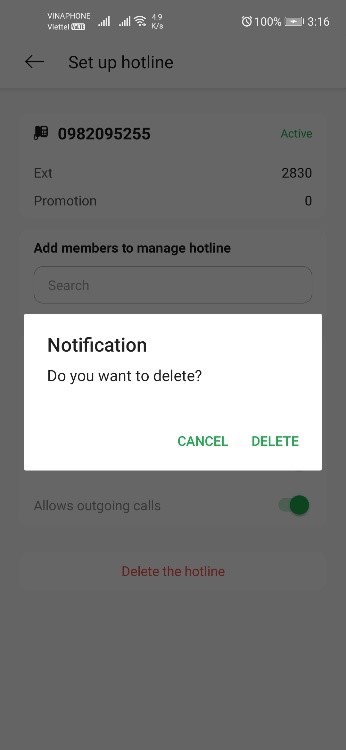
Delete hotline:
(Note: When you delete the hotline, the amount which you buy hotline will not be refunded)
In the hotline list, select the hotline to delete, click "Delete hotline".
Confirm deletion of hotline.
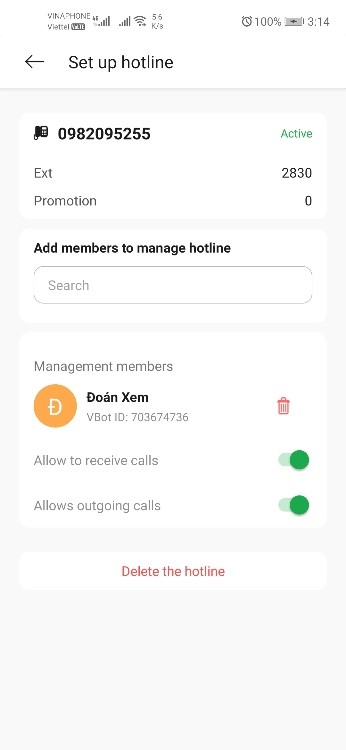
Add members to the hotline manager:
In the section "Add members to manage hotline", search for members to add
Click the add button next to the member to add your hotline manager.
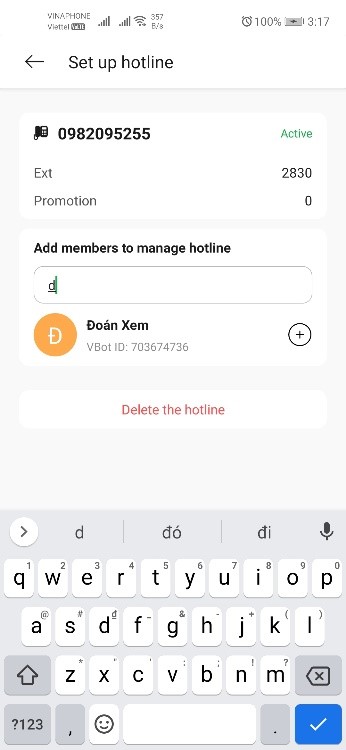
After adding members, the manager can allow / disallow members to receive calls and make outgoing calls with that hotline.
Remove members from hotline management members:
Click the delete icon next to the member to remove the member.
Confirm deletion.
Sign in to your account.
Click the icon in the upper right corner to open the menu.
A list of groups will appear on the outside with an avatar containing the first letter of the group's name.
For the group which you manage will have an icon, while you as a member will not have an icon.
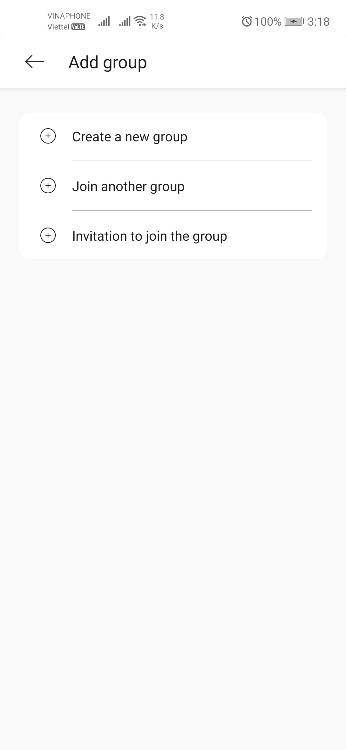
Add group:
(Note: each registered VBot account will have 3 free groups, if you want to create more groups, you have to pay extra fee)
Click the add icon to add group

Click "Create new group"
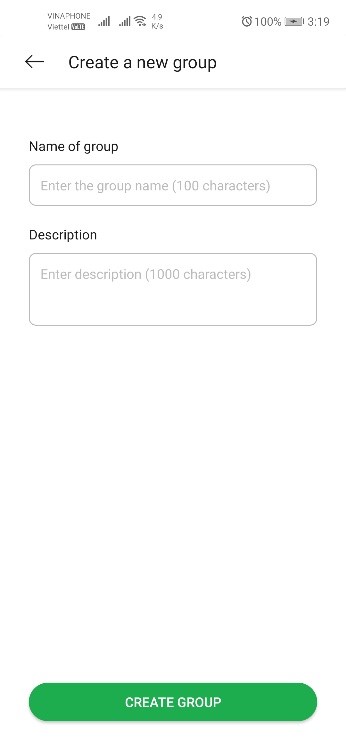
Enter the group name and description (you can leave the description blank), click "Create group" to create a new group.
Sign in to your account
Click the icon in the upper right corner to open the menu
Select "Manage calls"

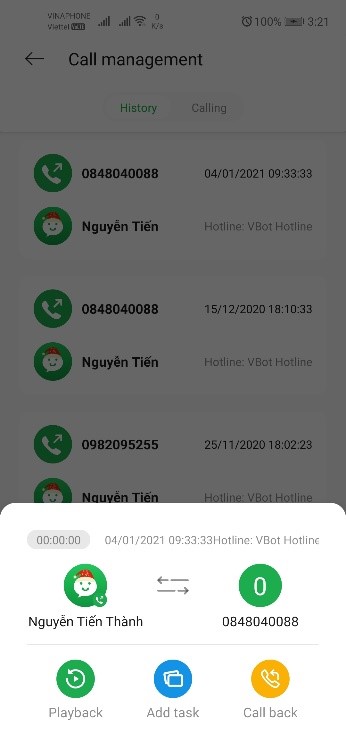
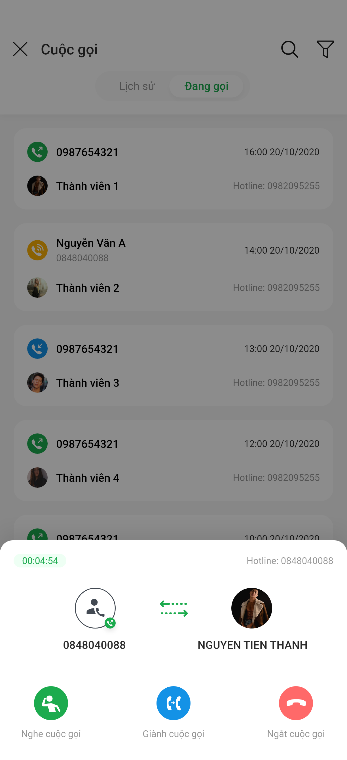
Manage call history:
Click on the call you want to review, there will be an alert to display information and manipulate the call.
Manage ongoing call:
Click on the call you want to see, there will be an alert to display information and manipulate the call.
Sign in to your account
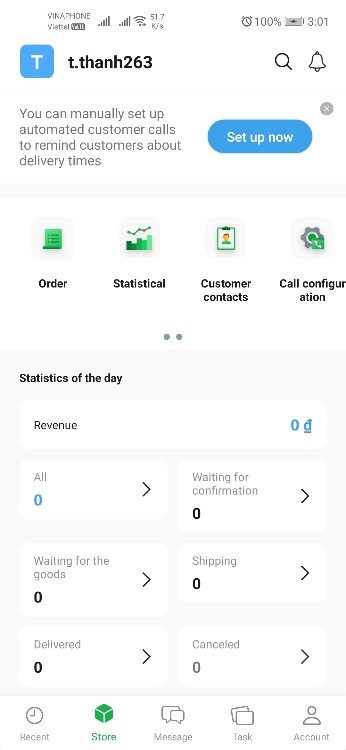
Select "Account".
Unregistered account: Click on the registration section to view details and register the VBot package.
Registered account
Sign in to your account
Click the icon in the upper right corner to open the Menu

Select " Configure switchboard ", a complete list of configurations will be displayed here
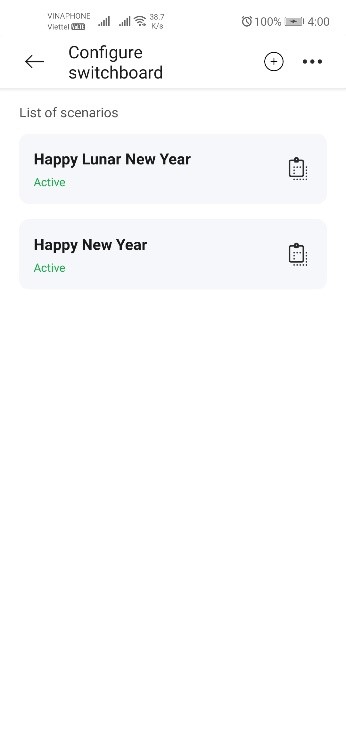
Click the + sign in the upper right corner to add a new configuration
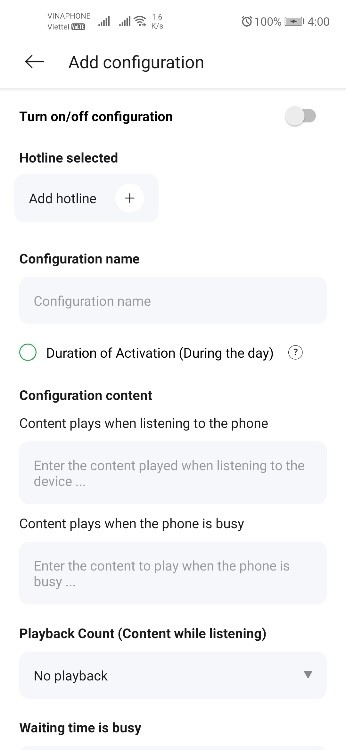
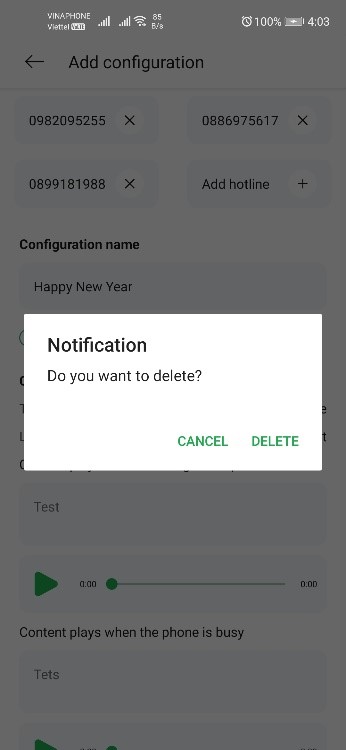
Delete configuration:
Select the profile to delete, drag down select "Delete profile"
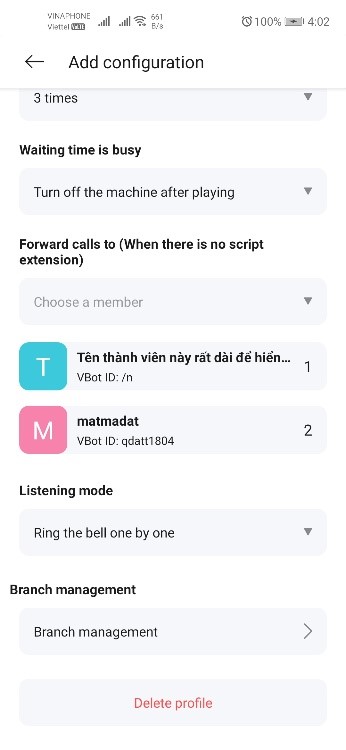
Confirm delete to delete the configuration
Add branch:
Select "Manage Branches", a complete list of branches will appear here

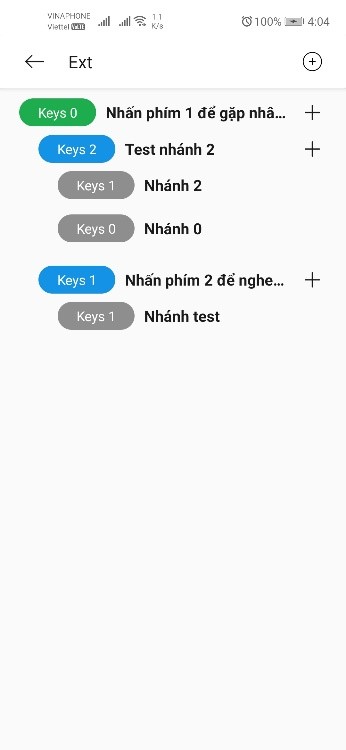
Click the + sign in the upper right corner to add a new big branch

Click the + sign next to the keys to add branches


Delete branch:
Select the branch to delete, scroll to the bottom of the screen, select "Delete branch".
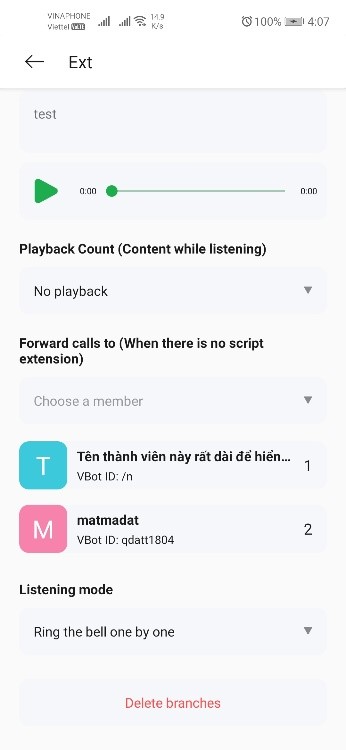
Confirm branch deletion

QR CODE
Download on
VBot is now available on Google Play, App Store and Windows. Download today for the best deals.

